

We take photos and record videos every day, and the mobile phone may quickly run out of space to hold them all. Owlfiles offers a simple solution: back up your photos and videos to a NAS, then free up storage on your phone while keeping your memories on storage you control.
This blog walks through the complete setup: preparing an SMB share on your NAS, connecting to it from Owlfiles, and creating a reusable photo backup on your mobile phone. The transfer runs directly between the phone and NAS, so you do not need to copy everything through a Mac or PC first.
Owlfiles is not tied to one NAS brand. The same workflow works with Synology, TrueNAS, QNAP, ASUSTOR, TerraMaster, Unraid, OpenMediaVault, and other storage devices that provide an SMB, FTP, SFTP, WebDAV or NFS service. We use SMB as file service here.
What you need
Before you begin, make sure you have:
- a mobile phone running iOS or Android with Owlfiles installed;
- a NAS with enough free storage for your photo library;
- your mobile device and NAS on the same local network.
1. Prepare an SMB share on your NAS
Owlfiles connects to a NAS over SMB, a standard network file-sharing protocol available on most NAS platforms.
- Sign in to your NAS administration page.
- Enable the SMB or Windows file sharing service.
- Create or choose a user and give it Read/Write permission for the destination share.
- Note the NAS name or local IP address. You can use the address if Owlfiles does not discover the NAS automatically.
The labels vary a little by platform:
- Synology DSM: Open Control Panel → File Services → SMB to enable SMB. Create the destination under Control Panel → Shared Folder and assign user permissions. Synology documents its SMB service and shared-folder settings in the DSM Knowledge Center.
- TrueNAS: Create an SMB-capable user, dataset, and share, then start the SMB service. The usual entry point is Shares → Windows (SMB) Shares. The TrueNAS data-sharing guide covers the account, dataset, share, permissions, and service.
- Other NAS platforms: Look for SMB, Windows file service, or CIFS in the sharing settings. Owlfiles only needs the NAS address, share, username, and password—it does not require a vendor-specific app.
Keep SMB inside your trusted home or office network. If you want to back up while away from home, connect through a properly configured VPN instead of exposing the SMB port directly to the internet.
2. Connect Owlfiles to your NAS
With the shared folder ready, add the NAS to Owlfiles:
- Connect the phone or tablet to the same Wi-Fi network as the NAS.
- Open Owlfiles and select the Connections tab.
- Tap the lightning button in the upper-right corner, choose SMB, and open Network Neighborhood.
- Select your NAS, then enter the username and password that has access to the backup share.
- If the NAS does not appear, add the SMB connection manually with the NAS name or local IP address.
- Save the connection, open it, and browse to the destination folder to confirm that the account works.
For a shorter walkthrough of the connection screen, see the Owlfiles setup guides for iOS or Android.
3. Create the photo backup
Now create a backup that points to the NAS folder:
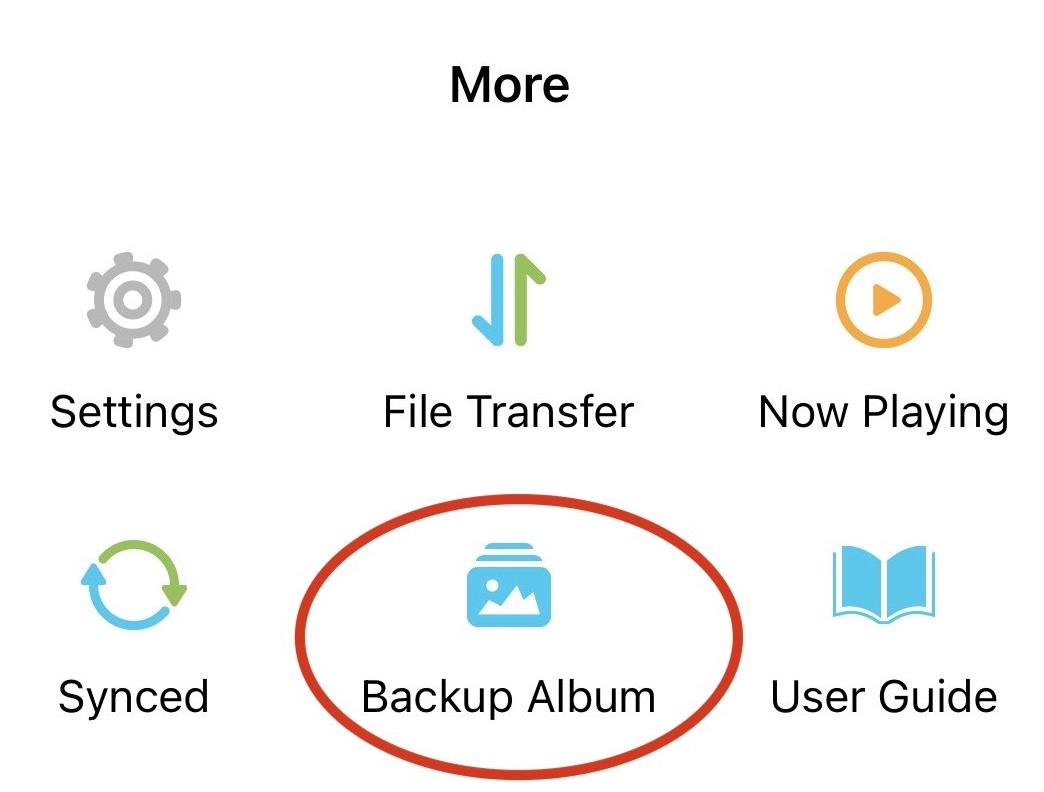
- Open the More tab in Owlfiles.
- Tap Backup Album.
- When your device asks for photo or media access, grant access to the items you want to back up. Choose full or all-photo access if you want Owlfiles to cover your complete library.
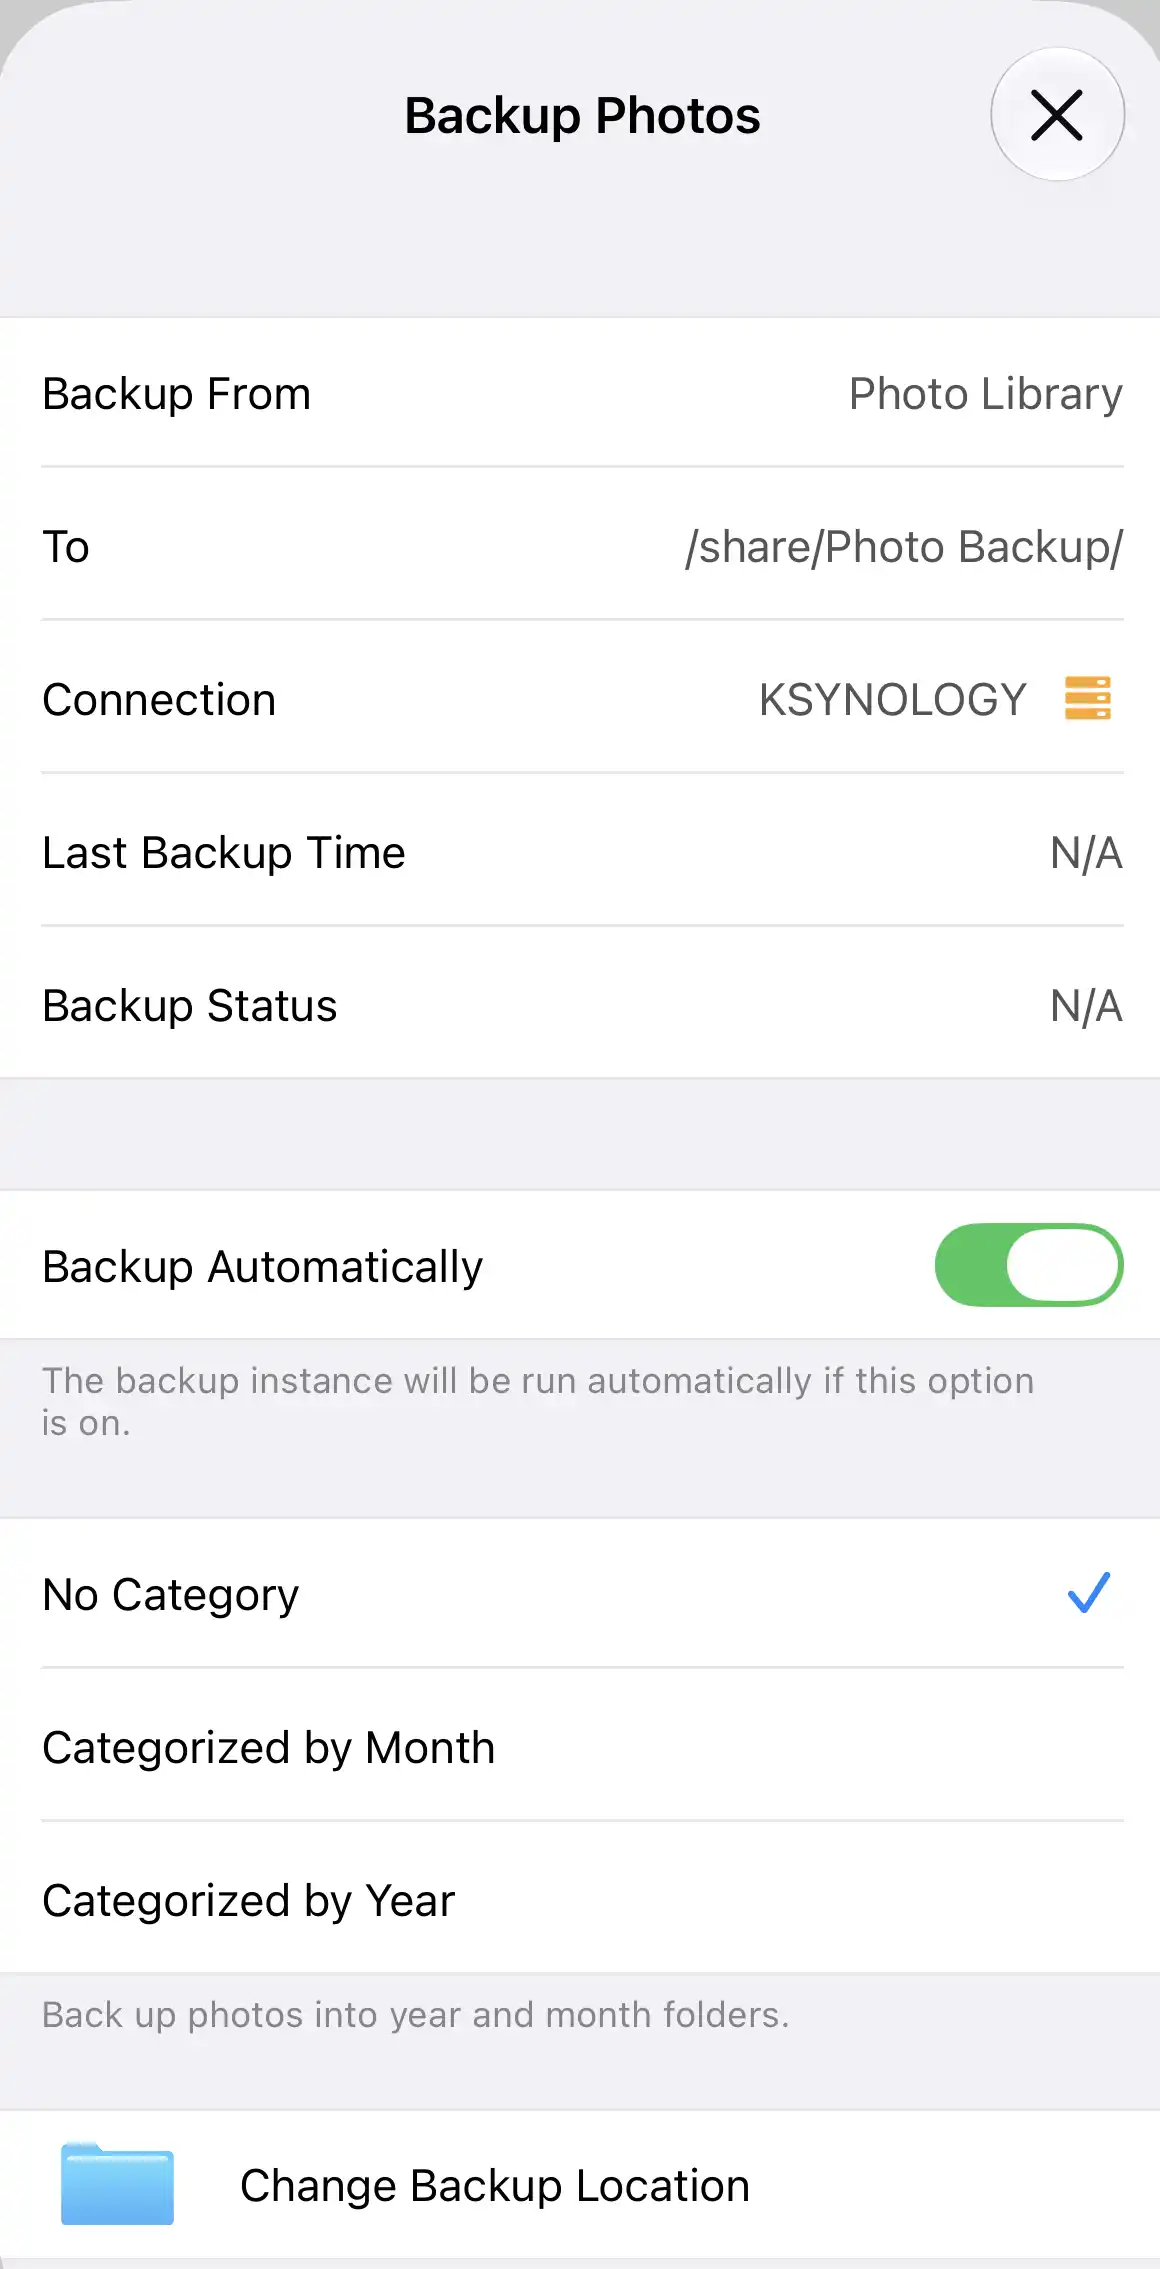
In Backup Settings:
- Check Backup From and choose the album or photo collection you want to protect.
- Tap Change Backup Location.
- Select your NAS connection, then choose the shared folder you prepared.
- Turn on Backup Automatically if you want to run backup automatically when you open Owlfiles.
- If you want to save photos in folders sorted by month or year, please select Categorized by Month or Categorized by Year.
- Tap Start Backup to create the first copy immediately.
Backups are cumulative
Owlfiles does not start the entire backup again each time it runs. After the initial backup, later runs add newly available photos and videos to the destination while keeping the items already stored on the NAS. This makes regular automatic or manual backups much quicker than the first one.
Free up storage on your phone
After the backup finishes, confirm that Backup Status shows Completed and open a few photos and videos from the NAS. You can then delete the backed-up items from your phone to reclaim storage; the copies saved on the NAS remain there.
4. Run a backup whenever you want
Automatic backup is convenient, but you can also start one on demand. In the More tab, touch and hold Backup Album, then tap Backup Album in the menu.
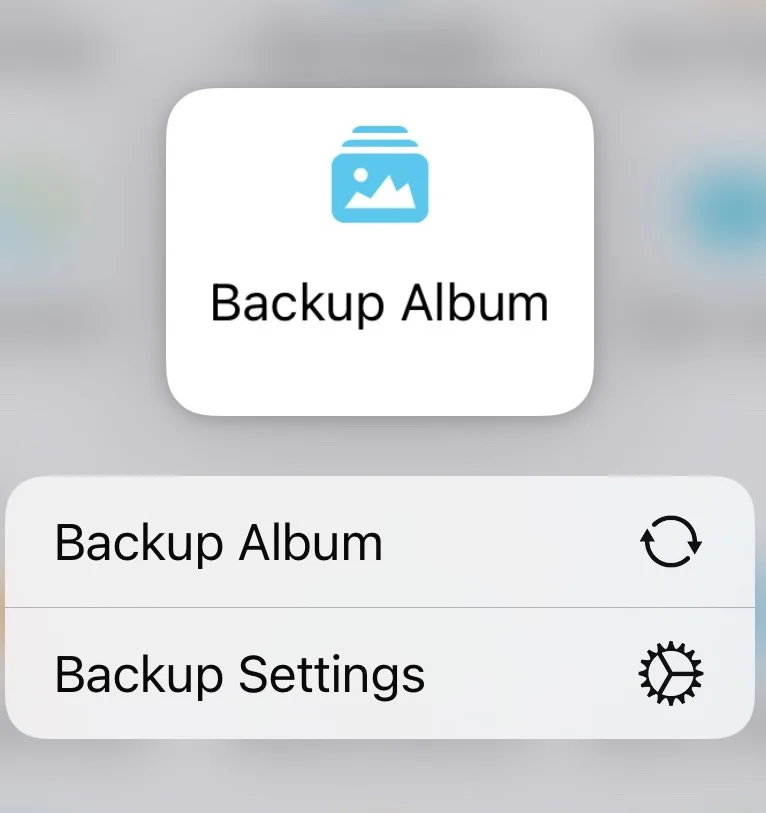
This is useful before a trip, after an important event, or any time you want to make sure the latest photos have reached the NAS.
Keep your photo backup simple
Once the NAS connection and destination are saved, the repeat workflow is small: let automatic backup handle routine copies, run a manual backup after important shoots, and occasionally verify the newest files on the NAS.
That is the real benefit of using Owlfiles for this job: your mobile phone can send photos and videos straight to a folder on Synology, TrueNAS, or another NAS, without adding a computer as an extra step. For concise in-app instructions, see the Owlfiles photo backup guides for iOS and iPadOS or Android.